But, is it calibrated?
![]()
That doesn’t make the comment under reply make any more sense.
I thought I was making clear how metal-on-metal could be problematic.
I understand that, but what does it being “metal on metal” have to do with it? The “screwed”-ness is because of the difficulty of replacing the mating thread on the engine if you strip it. I don’t see what it being “metal on metal” has to do with it. Whether one is screwed if one strips a thread depends in my experience on whether the item is critical and the ease with which one can replace the stripped parts. Not seeing what “metal on metal” has to do with it.
You really weren’t making it clear at all, sorry. Why does it being metal on metal make it more problematic if you strip the thread? How does the possibility of there being two different metals make it more problematic if one strips the threads when tightening?
Differing metals can cause seizure which is a problem when loosening bolts but I don’t see what that has to do with stripping the thread when tightening.
Threading a harder material into a softer material can make it easier to strip a thread but “metal to metal” says nothing to that topic.
The reason oil filters stay in place with essentially no preload isn’t that “ threads may fill with crud and the gasket could get sticky” but because the threaded hole in the oil filter insert is a very mild steel that is much softer than the stem they are screwed on, and are designed to deform since they are essentially a single use device. (Yes, I have heard of people trying to flush and reuse an oil filter, saving a few bucks at the expense of accelerated wear on the engine bearings. Brilliant.) The face seal gasket just seals and doesn’t really do anything to keep the oil in place, and in fact the ‘old way’ of installing was to rub some fresh oil on the mating surface of the gasket (some people insist that it has to be used oil, because witchcraft, I guess) but in fact the gasket will seal fine without any working fluid. It is not, as many people claim, an O-ring seal, but is instead a hollow deformable U-seal that just keeps the low pressure oil from seeping past; all of the high pressure regions are forward of the filter.
The reason that food jars with screw on lids can be difficult to open the first time is because they can develop negative internal pressure. This can be resolved just by hitting the upper edge of the lid a few times around its circumference to break the seal. If you actually have something gunking up the threads you should clean with a clean wet rag because threads are a haven for bacterial growth.
Reactions between metals in contact with a large electronegativity difference can cause corrosion, or in some cases binding and stress due to coefficient of thermal expansion differences. It isn’t just in automotive applications but anywhere where you have dissimilar metals in contact, and particularly when attaching aluminum to steel, where isolation measures and threaded inserts need to be used.
Yeah, oil filters do have a specified torque, but a shade tree mechanic can safely get away from tightening the filter to snug, and then turning it another 1/4 rotation of so. The most overtightening is going to do is compromise the seal by overcompression, causing it to ripple, and if you can tighten it by hand enough to actually pull out the insert you should reduce your dosage of supersoldier serum.
Stranger
Oil filter fairies?
Shade tree here…It can be quite a battle to remove an overtightened filter if someone previously used an oil wrench to tighten it. The filter crushes, oil everywhere etc…real waste of time.As Stranger says, hand tighten till snug, as it hits the seat, then 1/4 turn more. I always put fresh oil all around the gasket. I think a completely dry gasket “grabs” on the seat a bit, and doesnt hand tighten as far. Ive had a few leaks by not putting on an even coating. Fresh oil!! (and clean the seat from accidental grit) Many of the newer cars use a canister type filter, some on top of the engine, need more tools, but a bit easier. I bought an oil siphon kit recently, makes things a lot easier, still have to drain the filter itself though…
I use fresh oil on the gasket too. A thin film on the entire gasket face.
My current car is my first Subaru, a 2024 Outback Wilderness with the 2.4L turbo. And for the first time ever, the oil filter is on top of the engine, very easy to access, threads down and flat, and is in a small pan of sorts to catch the used oil from inside it. Very nice and very convenient. A great design! It’s still on warranty so the stealership is doing the service, but that filter location is great. I’ve had many engines where the filter location is awkward at best, difficult at worst. And you’ve gotta stay clear of the hot engine parts!
And I too will put in a Fumoto drain valve once I figure out which aftermarket skid plates I’ll install.
I agree that lubing the gasket isn’t about making it seal better, at least not directly. But if it’s “the old way”, then why does pretty much every filter still instruct you (either on the packaging, or on the filter canister itself) to lube the gasket before installation?
Once the gasket makes contact with the filter receiver on the engine, any further tightening means the gasket is going to be sliding - either across that receiver, or across the face of the oil filter. If neither face of the gasket is lubed, then its at risk for getting wadded up as you tighten the filter. Lube the gasket on at least one face, and the gasket won’t bunch up anywhere while you tighten the filter.
I’ve never seen anything but a square profile o-ring on the filters I use. Whatever’s there, it’s not just to keep oil from dripping out under low pressure. The filter is not upstream of the pump, it’s the first thing downstream of the pump, so it sees the highest oil pressure anywhere on the engine (except inside the actual journal bearings, where bearing loads together with hydrodynamic action generate film pressures in the thousands of psi). In fact, the oil flows into the filter at the outside perimeter, and out of the filter through the central hole - so the outside of the filter sees the highest pressure of all. The oil filter needs to be snugged up enough so that the outermost ring of metal - the part that encompasses the O-ring - comes very close to, or makes contact with, the receiver on the engine. If the gap is large, then oil pressure (maybe 50 psi or more during a cold start) may push the O-ring out of place. Maybe not enough to blow it out into the open, but if it’s enough to twist the O-ring so that it opens up even a tiny leak path, then you’ve got a problem. OTOH, once the metal perimeter of the filter makes contact with the receiver on the engine block, tightening it any more won’t improve the seal; it’s already as good as it’s ever going to get, and tightening it more will just make it a major hassle to remove it 6K miles later.
Dissimilar metals aren’t an issue in this setting. Just as one puts flux paste on wires to ensure that solder sticks to them nicely, motor oil includes chemicals that do pretty much the opposite of what flux paste does: it helps prevent galling/seizing when dissimilar metals move across each other under load.
That’s my point, yes
I’m saying that whether loosening or tightening, the anti-wear additives are in effect.
Elaborating on my earlier point:
If you don’t lube the O-ring, then in order to achieve the required degree of axial compression, you have to apply a lot more torque to the filter. It’s that extra torque (required by not lubing the O-ring) that can cause damage/displacement to the O-ring when you try to achieve the required amount of compression.
Same here. Only a square profile.
Yes. As well, for the many amateur oil changers who use their finely calibrated arm as their only torque wrench, the amount of actual turning and thread & gasket deformation they achieve will be less without lube than with. IOW your changing the torque versus rotation curve.
Going back to “self tightening” …
IMO … most threaded fasteners of any kind either become harder to remove over time due to general cruddiness and heat/cool cycles. Or they work themselves loose and fall off. If you put a torque wrench on every fastener on a 2yo car that had never had any work done and measured the break-free removal torque, good bet most would be higher than factory spec.
On modern (post ~1980s cars) oil filters and drain plugs are about the only threaded fasteners car-owners deal with directly. Changing plugs, points, etc,. and all the crap our fathers did to keep cars running is just not part of the scenery for the vast majority of cars (and owners) any more.
So the only fasteners they encounter to experience this legendary “self-tightening” are oil filters.
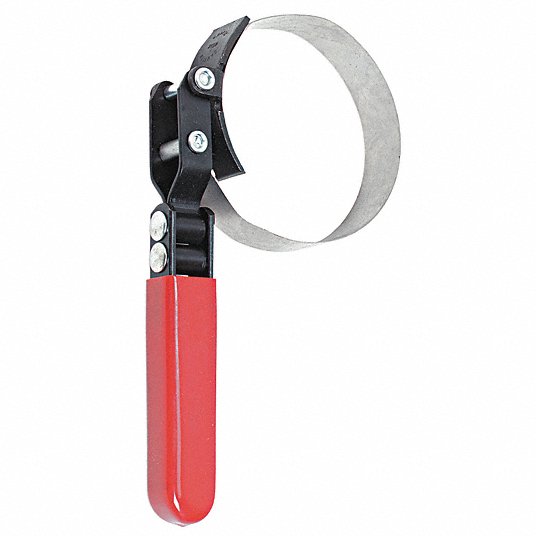
I don’t believe they tighten themselves. As others have said, temperature changes, humidity, road jostling, may cause them to tighten over time, but it’s not because of metal on metal or physical design on the filter. You are advised to not overtighten when installing, because you don’t want to strip the thread or break the filter. To remove, one of these inexpensive tools can be handy.
Not just DIYer’s, but those “Quick Oil Change” places also have a reputation for overtightening drain plugs.
I maintain about nine old cars, have a lift, and have come up with an oil change procedure that’s pretty much identical for each car:
- Put pan under oil drain plug. Remove oil drain plug. Drain oil. (Be careful not to burn yourself if the oil is hot.)
- Put pan under oil filter. Remove oil filter. If it’s very tight (which it usually is), use a big pair of pliers.
- Allow oil to drain at least ten minutes. (If I’m not in a hurry, I’ll often let it drain overnight.)
- Apply a thin film of new oil to the gasket of the new oil filter.
- Using paper towels, clean mating surface (on engine) where it makes contact with the oil filter’s gasket. Also clean the threads in the center.
- Tighten oil filter to engine. I don’t have a “rule” - I just make sure it’s as tight as I can hand-tighten it, and have never had a problem with leaks or removing them later. YMMV.
- Clean the drain plug using a paper towel. Note how much debris is on the plug if it has a magnet. Install new crush washer.
- Clean area around drain plug using paper towels. Hand-tighten drain plug.
- Look up torque spec for drain plug, and use a torque wrench to tighten it. If a torque value is not available, I have found that 20 ft lbs works well.
- Remove oil fill cap. Add the proper amount of synthetic oil to the engine. Make sure it’s the correct viscosity and correct volume of oil. Reinstall oil fill cap.
- Look under the engine. Make sure there are no oil leaks. (This is mainly to doublecheck that you reinstalled the oil drain plug, and that oil is not leaking from around the plug.)
- Start engine. Look under engine for oil leaks. (This is done to doublecheck that you reinstalled the oil filter, and that oil is not leaking from around the filter.)
Just because a cheater is required to get them off, doesn’t mean they get tighter. I’ve examined filters I’ve removed and found particulates in the threads. I think the cycles of heating ang cooling allow space for gunk to get in the threads and it’s this, and not self-tightening, that cause the need for a cheater. Hard to get off doesn’t equal tighter, necessarily.
My Cousin Vinny reference? If so, well played.
I’ve changed the oil on our 2012 Subaru Forester about 24 times. On the second oil change I installed the Fumoto drain valve. This car then became the easiest car to change the oil on due to the oil filter location and the new drain valve. Completely tool less!
Now, to the topic at hand: I never needed an oil wrench to remove the oil filter on our Subie. It might’ve been slightly harder to remove, but only slightly. I don’t think they are tightening themself. I guess someone could do a simple experiment - Score or mark a line from filter to filter base. Does the line on the two separate? I’m guessing no.
I am absolutely certain they don’t move. But the force to remove them is much more than the force they were installed with.
My only suggestion is to do one part at a time so your step 7-9 would be step 2-4 for me, i.e. deal with the oil drain plug completely before moving on to the filter. Less chance of a “Dude, where’s my oil?!” moment while driving.