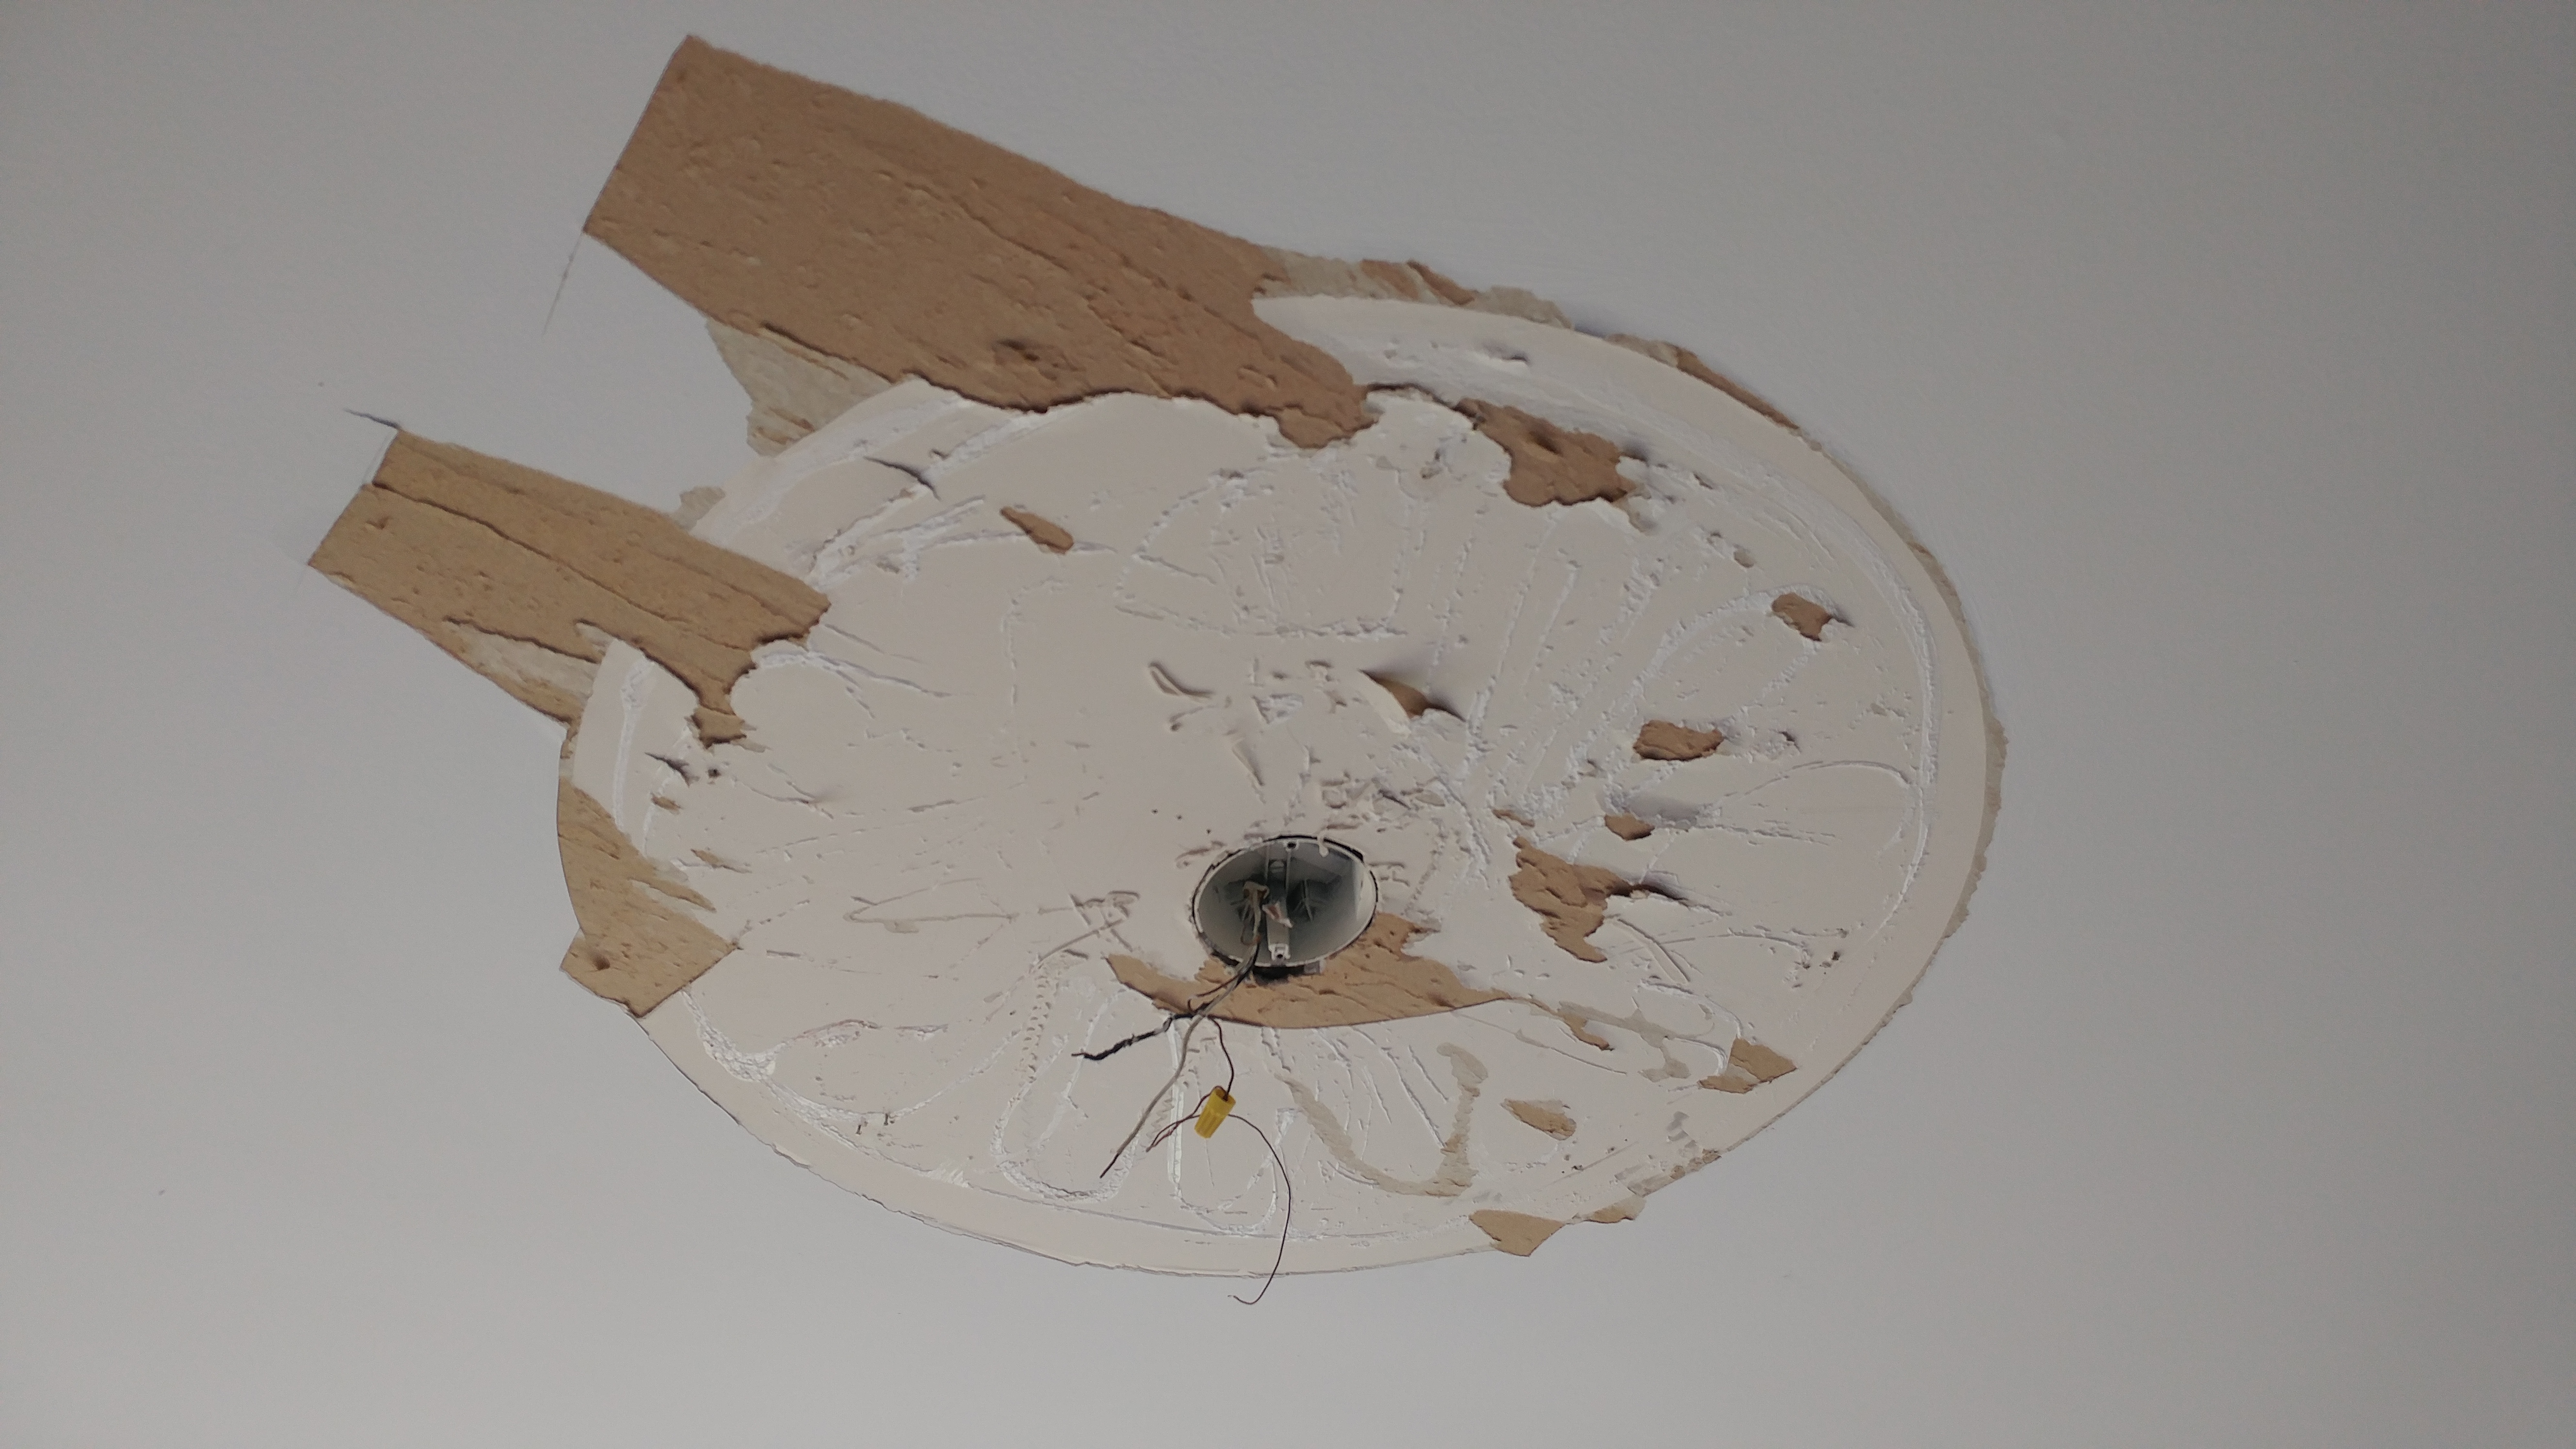
I removed a ceiling rosette from my dining room to put up a different type of light to replace the one the builder installed. The rosette was glued on. The area is a 30" diameter circle. There are a lot of rubbery glue strips and some torn paper. The glue strips can be peeled off but it is a bit tedious. I was originally planning on resurfacing the area. Now I am wondering if I would be better off cutting out the piece and replacing it but I am concerned about my skill level in getting a tight fit and a smooth finish on the edges, since I have never replaced a patch of drywall before. But is what is the textbook method for this situation?
Th textbook method would be to cut out the damaged section out to the nearest ceiling joist members and then cut a replacement patch to fit. You will probably have to glue wooden strips to the back side of the adjacent pieces or drywall in order to provide a suitable mounting surface. Once you get a piece screwed into place, you have to use drywall mud, tape and a selection of drywall knives to smooth out the surface. There’s any number of Youtube videos out there that can show you how to do this but basically, use a 4" knive to cover any screw holes and to force mud into the gaps. Apply tape while wet. Allow to dry overnight and mud again with a wider knife so that the new edge covers the old. Allow to dry then sand smooth. You’ll probably have to go over it again with more mud and still wider knife, allow to dry and sand one more time. Prime, paint and you’re done.
Note that this is very difficult work to make it look good. You can certainly get a strong, serviceable patch in a couple of days but to make truly invisible seams that you can’t see from across the room takes a lot of time and practice. Double this since you’re working over your head on the ceiling. I would think long and hard about trying to find some way to cover the damage or hiring this out to skilled professional.
If it was me, I’d probably scrape all of that mess off with a putty knife and then coat it with joint compound, sand it, paint it and hope for the best.
Even if it doesn’t work, it’s not going to make cutting out and patching it any more difficult.
ETA, not the ‘textbook’ method, but the easiest method is to simply install a bigger rosette (mostly joking, but they do make relativity plain ones).
I would add that you need to be judicious when applying the mud. Get it on too thick, and no amount of sanding will get it off. The best method is to feather it with the drywall knife and then sand out any minor imperfections. Yeah, it’s tedious and I hate it, but it can be done, although working over one’s head like that has made strong men weep.
Agreed, I should have emphasized this. You’re much better off with three or even four T-H-I-N coats of mud rather than one or two thick ones. Not only does it look better, it’s less prone to cracking.
Totally agree. Putting too much mud overhead is the worst:mad: I’ve done a few dozen of these types of repairs. I think I’ve made all the mistakes that could be made as well, and even invented a few of my own. (using really hard quickset type stuff and then letting it sag downwards? I had to do that one all over )
Its much easier of course if you have a rough spackle finish to match to, smooth gloss ceilings are just a lot of work.
I’ve done a lot of wall repair with tape & mud and have had no problems with that. It’s the idea of replacing a piece 30 x 30 that intimidates me. I’m sure that I would get really good at it if I did it a dozen times, but I doubt I could nail it in one (no pun intended).
It depends greatly on your tolerance for subtle imperfections. I know from bitter experience that I would eventually get it almost right. That little remaining bump or crease would just drive me absolutely, “Sheldon” level buggy. Even if nobody else ever saw it, I would see it every time I walked into the room. You do what’s best for you but I wouldn’t go near this.
Warning! I am NOT a professional and just relating my experience, which I’m sure that most pros would not recommend. But still …
That was exactly my problem when I had a roof leak in the previous old house that dripped through and essentially dissolved a few square inches of ceiling drywall and substantially wetted and weakend a much larger area around it. The obvious “correct” solution was to cut and replace an appropriate section of the ceiling drywall. After measuring things, long story short, it would have to have been a pretty big piece.
So I did it the “wrong” way. I let everything dry after the roof was repaired. Then I just applied coat after coat after coat of drywall repair compound – I may also have had to install a drywall screen or backing of some sort, can’t really remember. Anyway, the point was that after a lot of patient incremental applications involving no major construction work or risk, it turned out pretty well. Before I sold the house years later I had some of the major areas professionally repainted, and the painters – who were a rare breed of perfectionists – applied one final thin coating of drywall compound to my repair job, sanded it down the next day, and the repainted ceiling was absolute perfection. This despite the fact that I’m sure any professional would have scoffed at my patching approach to this repair job instead of cut and re-drywall.
Take it for what it’s worth. Point is, your job in a sense is easier because you have a solid base to work with, while I had to build one up. If you can sand all that crap reasonably smooth, it ought to be pretty easy to then just even it up with drywall patch compound in a couple of application/sanding cycles, and repaint. Getting drywall patching to be absolutely flat and even is actually one of the easier home repair jobs with a bit of practice (and the right tools), although working on a ceiling is a PITA.
Cut to the middle of nearest joists. So you have something to screw into.
Cut a 1x2 furring strip into five inch pieces. Slip behind the old drywall and screw into place. Put patch into place and screw into the strips. You’ll need one of these every foot along the patch.
This will secure the unsupported edges and prevent the seam from cracking.
A patch in the middle of the ceiling is difficult to hide. I’d look for someone that works for a drywall contractor. Hire them to tape & mud it professionally.
Prime with Kiltz. Repaint the entire ceiling. The patch should be invisible.
A couple of tips around sanding, if you go the DIY method:
- Do not use a power sander of any kind. Oh, sure, it’s quick - but you will be cleaning up dust for years. Don’t ask me how I know this, but rest assured that you can trust me.
- Actually, don’t use sandpaper at all. Too messy.
- Use a damp (not wet, just damp) sponge to smooth the mud. It’s less messy and gives a nice, clean finish. It is important, though, if using this method to apply thin coats of mud. Let the repair dry completely before reapplying mud or damp sponging again.
If you haven’t done drywall work before, you’ll likely find this task very challenging. Getting a good result take some skill on a regular wall. It will be a lot harder when working on the ceiling. One reason is that you’re working overhead, which is going to be more challenging from a motor-skill perspective. But the other reason is that a ceiling is a big, flat surface which often has light hitting it at a flat angle. Because the light travels along the ceiling, imperfections will be highlighted by shadows. Flat walls also have these imperfections, but you don’t notice them because the light is hitting straight on. If you shine a bright light along a wall, you’ll typically see waves, bumps, etc.
If you’ve done drywall work before, I think it’s worth giving it a try. I would try remove that gunk and then smooth the surface with mud and sanding. Replacing the drywall is something you can always do later. You’ll need to prime the patch before painting or else it will show through the paint. You should plan on priming and painting the whole ceiling for the best chance of getting a good finish. Painting the ceiling can be challenging as well because you’ll want to avoid lap lines which can show up as defects.
I’m pretty handy and I’ve done a fair bit of drywall repair work.
It’s REALLY hard to get perfect. Walls tend to catch the light as the sun shifts during the day, revealing even tiny imperfections. I’ve never been 100% satisfied with my work.
If you’re the sort of person that wants it just so, I’d recommend paying a professional or using the idea above of just getting a larger rosette to replace it and covering the damage.
Thanks to all for advice so far. I am going to take the coward’s way out and finish, sand, and paint as-is. If I get a shitty result then I’ll hire a pro to just replace the section.
The new light is a long bar with two down-rods so the whole idea here is to get rid of rosettes altogether.
You can probably get a great result if you are careful and take your time. Here’s what I recommend for a newbie. Initially get all the gunk off and remove all the high spots. It’s okay to have gouges initially, but you don’t want any bumps since it will interfere with the edge of the putty knife. You want the knife to be able to glide smoothly along the surface. With a small/medium putty knives, fill in the gouges as best you can. Sand it smooth and then fill in any gouges again. Repeat the process until everything is relatively flat. At the end go over it with a 6" putty knife to smooth the whole thing. You’ll have to use some finesse to feather the edges so it blends with the rest of the ceiling. Sand it smooth. Get a really bright light and shine it along the ceiling to highlight any flaws. Prime and paint the whole ceiling. Watch some videos on how to paint ceilings. You want to go from wall to wall with one long stroke to avoid lap lines. Get good roller that can hold enough paint for the full stroke. Lambswool is good for that.
Someone recommended using a sponge to sand, but I wouldn’t recommend that for a newbie. While it works great, it takes some finesse to get a good result. A newbie will likely get a smoother result with a drywall sanding block.
Thanks. I haven’t used a sponge for this but I’m not a newbie. I’ve done quite a bit of drywall repair, with good results; I just never cut out a square yard of it and replaced it with a patch.