Whew, what a long day, but it was so fun!
I did as a matter of fact get some good scissors, and was told to get one pair for fabrics (and ONLY fabrics) and one for paper for cutting the patterns and the like. Duck Duck Goose, are you my teacher? Because that’s exactly what she did with us. She gave us paper with lines, and had us run it through to practice with no thread, then another paper to teach us how to make turns while sewing.
Then she gave us small squares of fabric to do actual stitching. Who knew that putting the thread in the machine was so complicated? x_x
Well it was for me anyway.
I was told that my lines were really good, she even told me I was ‘perfect’ and one girl asked me if I’d done it before. It made me feel good.
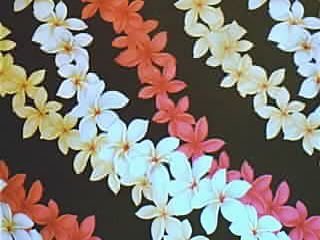
The first project we’ll be doing is making shorts, for which I bought a really nice Aloha print fabric. I’ll be making it into a pair of boxer shorts with an elastic waist.
The second project would be whatever we liked within reason, so maybe I’ll make a nice shirt or something.
The fabric is 100% cotton, which if I remember right, we were told to put it in the washer on the spin cycle with no soap to pre-shrink it before we work on it. It can go in the dryer, right?
Shorts are a good project; fun and easy. To prewash, yes you can put it in the dryer, but you should pink or zigzag the raw edges first so you don’t get too much fraying. It’s a good idea to shrink the fabric as much as possible before you turn it into something neat (says the woman who practically never does, despite painful lessons).
I should pink the edges?
That’s something she didn’t mention, so I have no idea what that means. Though maybe I could wash it and hang it up to dry instead, so there’d be less fraying?
Well, the washing machine will do its share to fray the fabric too. You’ll get wads of string wrapped around your fabric if you don’t do something to the raw edges to keep it whole. Pinking is when you cut a zig-zag in the fabric, which stops fraying somewhat. You do it with special pinking shears. Or you can run a zig-zag stitch down the edges too; that works just as well or better. It won’t matter after you wash the fabric, because you’ll just cut out your shorts and you won’t use the edges.
You don’t *have *to do it; but it will make your life easier and will destroy less fabric in the wash.
I’ll keep the pinking shears in mind, I’ll buy a pair for my sewing toolbox I’m going to buy to keep everything in. However, our teacher didn’t mention them, so I’m not sure if I’d get in trouble doing it. I really appreciate the help you’ve given though, I’ve learned a lot already. For my second project in the class, I’ll ask her if I could/should use the shears I’ve bought, and if she says sure, I definitely will for that one!
And Doc, that’s really good repair work! That’s one reason why I’m taking the class, so I can repair my own clothes instead of having to throw them out.
One of the best things about sewing your own clothes is that you can line up the prints at the seams. For example, picture a shirt with a wide horizontal striped print. Now imagine looking under the arms along the side seams where the front is sewn to the back. Do the stripes line up? On good quality clothing they will, but it’s amazing how frequently they won’t on store-bought clothing. While it’s most obvious and a “must” for stripes, a the same is true for other prints. Perhaps I am a little OCD? But that is one thing I miss about sewing clothes.
My one other hint is that when you cut a pattern out you should cut a copy out of newsprint. I think I used to do this by putting a sheet of newspaper over the fabric but under the pattern when I cut it out. This way you can use the pattern over again if you like it without dealing with the fragile tissue-paper pattern. The fabric store might not tell you this because they like to sell patterns.
The whole ‘lining up the pattern on the fabric’ thing is something that I was thinking of as well. What made me think of it was how on the online program “Second Life” the clothes you buy usually doesn’t line up, and the textures can look off. I knew that such things would carry over to real-life workings, and I might very well get completely OCD over it. I’m a stickler for perfection a lot of times.
And I never would have thought of making a copy of the patterns by using newspaper, I’ll definitely do that!
I’m sorry to say that a needle can go partially through your finger even when you are hand-sewing. Sob. Under one of my nails is still recovering.
My only concern would be ink coming off on the fabric or your hands to the fabric. I’m not sure if Harriet meant clean (not printed) newspaper? Or brown package-wrapping paper is good.
Report back with progress–we love to hear about new crafts projects!!
Thimbles are for wimps. Even when I’m patching leather, I just use my fingers.
[can’t believe I’m posting in a stitch and bitch thread… but I just fix buttons, put patches on stuff, and make minor repairs. I don’t use any fancy-dancy machine or anything…]
I don’t use the machine either, but hours of hand-stitching in a row require a thimble. For hand-piecing, I use a leather thimble though! Maybe I should attach some sort of studding to it.
I never even stopped to think about the ink option. That right there probably has saved me in the future.
And I definitely will still get a thimble for a while, at least while I’m still learning. After that I might not use it and just let accidents happen.
As for updating on the project, I certainly will. I know if I pull it off, I’m going to be so happy I’ll probably burst.
Good point. My local newspaper uses ink that doesn’t rub off. If yours doesn’t use that kind of ink, you can get plain newsprint or cut open paper bags would probably work.
