Take the time and expend the effort to name your stuff correctly the first time. It’s about the only way to avoid reworking names.
In your OP you say you want to keep every version of every file. In this most recent post you suggest that old versions of files in the Wrk folder are now useless.
I don’t see the problem. A backup will typically be either full or incremental. Either way, the problem doesn’t exist. You won’t have duplicates of the two folders, except insofar as you may have multiple backup images, but there won’t be any confusion. The latest backup will have whatever the new folder name is and not the old one.
Unless I’m completely misunderstanding your question.
Or unless your strategy is copying files and folders rather than actually running a proper backup to a backup image, and overwriting them on whatever the destination is. Only in that situation will both folders exist. But that’s a poor way to manage backups.
Not only VAX/VMS, but any DEC OS that used the Files-11 file system supported file versioning, in the form filename.ext;n where “n” was the version (up to 32,768!).
No, incremental backup not only copies everything that’s new since the last backup, it also will not copy anything that has been deleted from the source since the last backup (when you rename the Wrk folder, you’re effectively deleting the original – it’s no longer there). So again, no problem.
Just for the sake of completeness, you might wonder how an incremental backup restore distinguishes between a file or folder that is absent from the latest incremental because it wasn’t copied because it hadn’t changed, versus it wasn’t copied because it had been deleted. The short answer is that either the information about the deleted file is recorded as metadata in the new backup, or more commonly with modern backup systems like Macrium Reflect, they use a snapshot technology where each incremental backup is actually a full backup from a logical view, but an incremental from a storage perspective, so again, the “delete” information is preserved.
Keep in mind the differences between Macrium and Backblaze (which was also recommended) because they’re quite different, Pick the one that’s right for you.
Macrium Reflect is right for me because it’s a local backup solution that creates disk images to local storage (though I suppose you could also transfer the image to your own cloud storage, but I don’t do “the cloud”). You can recover individual files or folders from the image, but most importantly, it contains the complete contents of the disk including the operating system so it can be used (in conjunction with bootable recovery media) for complete bare-metal disaster recovery.
Whereas Backblaze is explicitly a file backup and recovery system that is oriented to backing up your files to the cloud. That may be just what you need and all you care about, but if your disk fails or your OS needs to be restored, you’ll need a different solution for that.
I agree – always a good idea to review the specs. Just remember that the two products have different objectives, as I already described, and pick the one that’s right for you. Or use both, as some do.
I’ll also add that some backup software like Macrium Reflect uses Microsoft VSS (Volume Shadowing Service) to copy everything on the volume, including files locked because they’re in use. I don’t believe that Backblaze uses VSS and may not be able to back up open files. I haven’t used it and if anyone has information to the contrary I’d be happy to be corrected.
Absolutely! I’ve done exactly this several times. Of course you need to have bootable rescue media prepared in advance in order to move the system to the new drive.
With Macrium Reflect (or likely many other backup programs) you’ll likely need to Google how to tell it to expand the user partition to the maximum available size of the new drive, or else you’ll end up with a new drive with the same partition size as the old drive, and a whole bunch of unused space.
But even if that happens, a free utility like QuickPar, or Windows itself, can resize the user partition to the full extent of the disk.
You may be confusing different things. The CD would be to contain the bootable medium that you use to restore the backup image you created onto the new SSD. It’s not for containing the backup image itself.
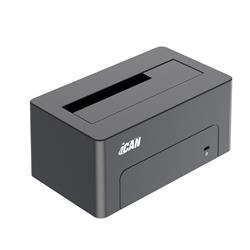
I assume the backup image would be on an external USB drive. The problem with something like pCloud is that backup rescue media may not have network access. I’d feel much more secure with a local external drive. Alternatively, for about $20 or so you can buy a docking station like the one pictured below. Take out the old SSD, pop it into the docking station, install the new SSD into the computer, and clone the old SSD to the new one, then expand the partition to the full available size using either QuickPar or Disk Management in Windows Administrative Tools.
The new drive in the laptop will be empty. The laptop will be totally dead.
You will need:
Bootable rescue media (CD or USB stick) previously created by some backup software capable of restoring from a local backup image or capable of cloning.
Either a previously created backup image on a local external USB drive, or the original SSD in a USB docking station.