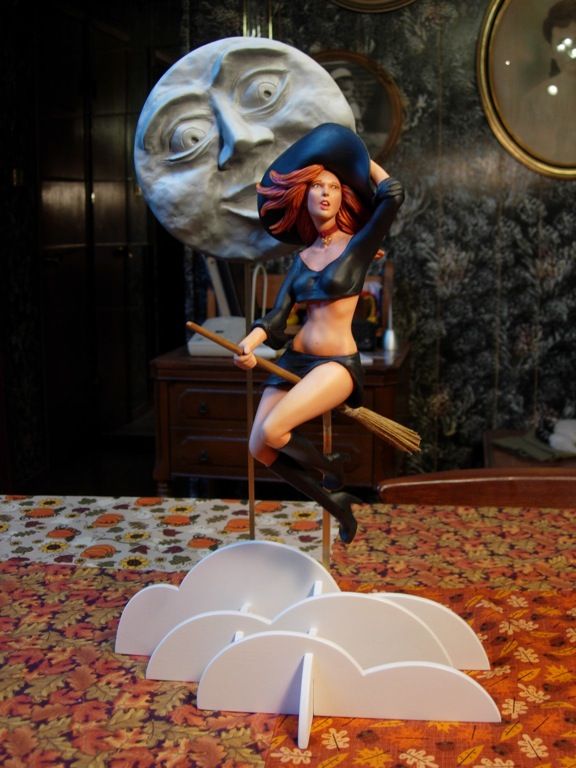
I bought this resin kit of a winsome witch a couple years ago at Wonderfest, and I finished her just in time for Halloween–although, to be truthful, some of her paint was still a bit damp on the big day
I modified her figure and clothing just a tiny bit, and reworked her broom. The broom is a “Grandma’s axe” sort of thing; when I got the kit the handle was warped, so I replaced it; and then later I decided I didn’t like the bristles, and made new ones–so I guess the broom is completely scratchbuilt by now
I’ve been trying to pay more attention to overall composition, and on this model I devoted a lot of thought to her base. Actually, I had to; the base that she came with was unusably crude. I wanted sort of a stylized look, and I wanted to emphasize her youth and naivete. I ended up sculpting a cheerful moon, keeping an eye on her, out of modeling clay–first time I’ve ever sculpted anything–and making a resin copy. The clouds are light plywood.
Looks amazing. Always envious of the people with the skill and patience to do this sort of work, especially when it includes modifying and creating elements.
Cuts down on wind resistance. Can you imagine flying around in a full gown or robes? Flap, flap, flutter, flutter – be lucky the wind doesn’t pull you right off!
Say, next time you work from a kit…include some “before” pics too! I’d love to see what you had, initially, to work with!
I have one resin model of a figure, which I have glued together…but don’t have the courage to paint. I’m terrified I’ll just muck it up. Among all your other talents, you can paint “within the lines.” Your paints don’t smear out beyond where they’re supposed to go.
(If I’d done your witch, the red from her choker would bleed over onto her neck. Ick.)
I use oil paints for my final colors; one advantage is that you have complete control over the viscosity (by adding oil or mediums) and you can get it so the paint flows nicely off the brush–which gives you the control you need to “paint within the lines”.
I usually paint one area (the skin tones, for instance) and then let that dry completely; then i give it a coat of clear matte-finish lacquer (dullcoat) before painting the next area (the blouse or whatever). That way, if I make a mistake, I can gently remove the sloppy area before the paint dries with a brush wet with thinner, without messing up the previous area.
Also, before painting, I avoid caffeine and sugar, and cultivate a calm and resigned attitude.
I’ve built models on commission before; the basic problem is that you can’t charge enough to make it worthwhile. Most normal people are willing to pay maybe $200 for a model; on a per-hour basis, that’s pretty paltry. I recently dismantled, repaired, and painted a Batgirl figure for $200. I had maybe forty or so hours into it, so I was working for $5 an hour. Minus my expenses for primer, putty, glue, and paint. So I obviously wasn’t working to get rich; actually, I was working because I liked the figure and I liked the client. But for that kind of money I would never build a model I hated or work for a client I couldn’t get along with.
(I have had the pleasure of building a couple things for a very rich man, and those times I was able to bid the job so that I felt well renumerated.)
And of course, the complexity of the job can vary immensely, which would affect the price. Why don’t you send me a picture of what you’re thinking of via private message, and I’ll mull it over?
As usual, excellent. Your venture in to actually sculpting went really well. The clouds are nice as a base, but the moon is perfect. It is much closer to the style and feel of the witch. I opened the pics before I read your description. I immediately knew you’d made the clouds, even though they’re well thought out and executed, but I thought the moon was part of the original set on first view.
I’ve missed the edit window by quite a bit, but please replace “actual sculpting” with “sculpting from non-found materials”. I’ve considered your work sculpture from the first time I saw what you were sharing with us.
Down toward the bottom there’s a picture of the parts breakdown. Also, you can see that the original base, although a clever design, is a little rough around the edges.
