I’m starting this but please put up your own. Nice to share ideas.
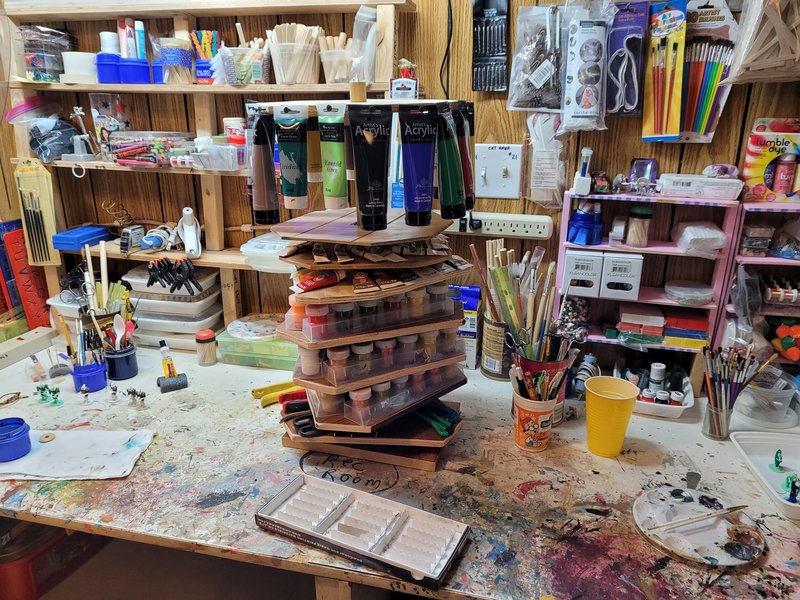
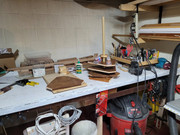
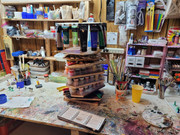
My craft bench is 99% reused materials and despite reinforcing it, I’m really surprised it survived the move. I needed better paint storage for it and designed and built a caddy with materials on hand in my shop.
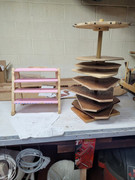
A quick 1 day project as a follow-up to the craft bench reorg.
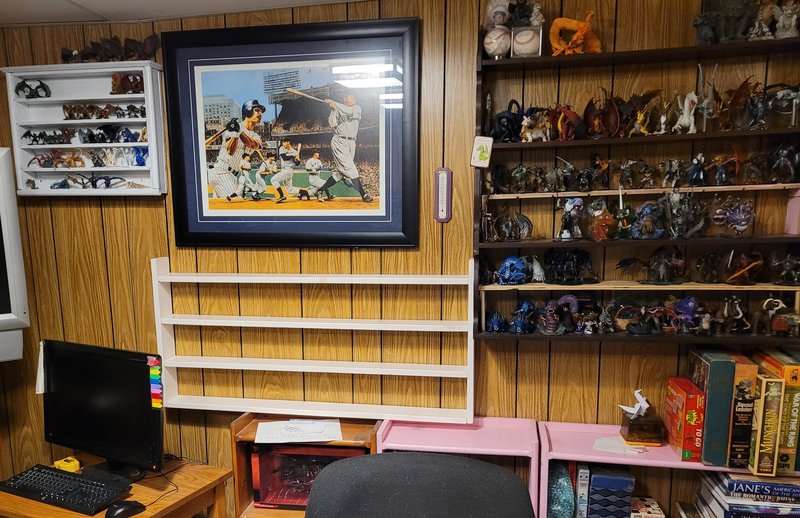
New and very handy paint caddy.
. . . . Click small pictures for larger.
Again, all recycled materials except the wooden dowel. I had a 1" dia 48" piece already though.
Each little shelf spins a full 360°. I is a nice step up from that little tiered pink shelf unit I built years ago as seen in the second picture. I already dismantled that and stowed it away.
That is a nice idea. Pot lids get annoying. We’re getting the kitchen redone this year. I’m letting Pros do this one. All the lower cabinets will be drawers. (except the sink). So lids shouldn’t haunt me anymore.
I fixed my drill press for $21. New chuck and it is as good as new.
I’m trying to fix my band saw now. I’m fine tuning all the adjustments and ordered 2 new thrust bearings. The ones on it are probably original and so around 50 years old.
Next up is back to my lamp project. I stopped part way through due to foot issues and then back issues. I’m making lamps for the living room out of Cherry Wood. It is fairly complicated but I’m a wood worker and was an electrician. So doable.
Thanks so much for sharing. C’mon, everyone else (because I don’t have an example, so I need to get inspired by you folks).
And it’s so good to see shots of a workbench that doesn’t look like Martha Stewart styled it for an IKEA catalog. It looks like a bench where someone gets work done!
Have no pictures to share yet but I intend to get back into some DIY craft work again. My dad used to have me help him out and I enjoyed learning from him and used to have a small room for little projects like mini book shelves and that sort of reasonably straightforward stuff that I’d follow on instructions from a book as a hobby when I became older. More ambitious stuff just required more time, space and money which I didn’t have then. Now I want to get back into doing things again because if one thing Covid has made me realize (unrelated to the medical pandemic itself) is that craftwork, learning new skills and returning to old hobbies is far more satisfying and stimulating than sitting behind a screen for hours on end.
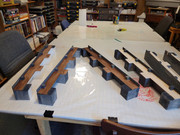
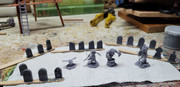
Little 2 day project. 6 Castle Walls made of packing foam and balsa wood. Many of the fasteners are just half toothpicks.
As usual click thumbnail to see larger picture.
The microcell foam cuts so nicely on the bandsaw that this project was very easy. The foam was leftover from something that arrived in the last few months. I looked at it and said, castle walls.
I’ve been busy the last 3 days. I made stairs for the castle walls above with small grooves so figure bases can fit on the stairs better.
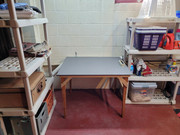
I created a space in the basement near a window for my new 3D Resin Printer.
This has it near the deep sink too. I rebuilt a table for the printer. Also ended up with 2 extra plastic shelves and so built a new floor brace to give them structure to hold a medium load. …
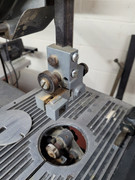
I’ve been trying to get my band saw working again. I’ve adjusted every adjustment. Watched videos and re-adjusted and ordered new thrust bearings for it. They came today and I just installed them and my 50 year old Craftsman 12" band saw appears to be working correctly again. I also put on a fresh blade.
You can see the bearings in the next picture:
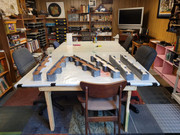
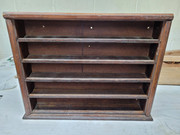
I have an old pool ball rack, (for holding the balls on a wall). I’m flipping it over and painting it bright glossy white to be a miniatures display.
I sold the pool table last year but kept this and 2 cues.
Next up is setting up the printer, calibrating and testing. Also 3 motion sensor lights for the Garage and stairs to basement and attic.
I built this workbench in mid 2020 (I wanted to say last year, but… it’s COVID time):
I really like how the retractable shelves came out. I’ve since installed deployable casters so I can move the bench around.
Since then, I built a portable cloud chamber (radiation detector/visualizer). Thanks to @Arjuna34 for the tips. Here it is with the side panel removed so you can see the interior:
And a better view of the action, showing alpha particles from a smoke detector ionizer and some background radiation:
The first print, Warning: this silliness takes 4 hours to print. Don’t let it be your test print if you’re eager to start printing.
Thanks to @Dr.Strangelove’s excellent advice, my dirt cheap resin print curing station. A UV Light and a cheapie display rotating table. I like how the camera picks up the light more violet than my eye does.
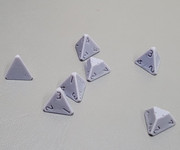
My first fail. I split my D4 test incorrectly. Funny thing is I did this as it was so simple.
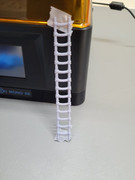
Gravestones I printed and painted already. Nice addition. Also a stirge, a mind flayer pirate, a cauldron monster might be related to Oscar the Grouch; a demon. A printer ladder for the wooden watch tower in the background
Printed Rope Ladder
The wooden watchtower I threw together yesterday. Cheap dowels, tongue depressors and some Elmer’s Glue.
How about a DIY that didn’t work? I’d been trying to fix my old AR turntable (history here), and had hit some dead ends years ago.
But then my wife said “Wouldn’t it be nice to have LPs going while the whole family’s over for the holidays?”
So I dove in and got to work… and after two weeks of trying, realized I could NOT fix the motor, or the tomearm. So took it to a pro, who said “This’ll cost you over a thousand dollars… IF you can find a motor.” And the only ones I’d found were old (and on their last legs), or hacked industrial motors that I’d have to build up with 3D-printed pieces, in addition to sawing and milling the shaft (perfectly)…
So my DIY project was, for the first time, admitting that it’d be better to just give up and buy a new one.
The AR before, and here’s the after, a new Music Hall turntable.
Bonus: it goes so much better in our cherry-and-black craftsman-style house than the taller, faded walnut base of the AR.
AND, at Thanksgiving, everyone got to rummage through my old vinyl and I got to stay in the kitchen and didn’t have to worry about squeezing the cartridge just so to get rid of that buzzing, and hey, is it skipping? Better run out to the living room and grab that lightweight headshell and adjust the tracking/weight…
eta: I should mention that the guy I bought from (at the “HI-Fi Haus”) let me trade in my old AR for parts.
DIY is what I do. Or did. Still do to some extent. There are some things that are either outside my abilities or something I don’t care to try (like laying tile). Since we’ve lived in this house, I built and installed herb boxes on the deck, built a nice sitting bench for same, built a woodworking bench and stool, fixed an electrical problem in the RV, fixed the sound system in the RV, replaced a few outlets in the house, built stands for the large planters at the side of the house, refurbished the top of our dining room table, made magazine holders for the living room, built out one of our closets so it would hold more clothing, put in shelving in an unused architectural recess, made an end-table for the living room, installed a screen door on the front entrance, installed a bidet toilet seat. . .and I’m sure there are things I’m forgetting.
Here’s a series of five pics of the woodshed I built from reclaimed materials in August. When we moved into our new office, the contractors left a construction table. I used the table top (which I painted with grey deck paint) as the floor, the sides of the table as the ends, and the 12-inch cruciform supports for the triangular parts of the ends. A sheet of 7/16-inch OSB cut to size made the back, and corrugated polycarbonate made the roof. I used untreated 2x4s for the framing, and pressure-treated 2x4s for the floor frame. I hand-excavated a 4-foot by 8-foot level area and built a frame out of pressure-treated 4x6s, which I had filled with gravel.
Thank you. It would have been a shame to send all of that ¾-inch plywood to the dump.
CORRECTION: The floor of the shed is the central support for the table. I did not take the tabletop because it was MDF and I didn’t think it would hold up to the weather as a roof, and it wasn’t wide enough for the roof. Also, it was very heavy and I would have had trouble getting it up the stairs by myself (especially with the 180º turn midway) and getting it on top of the Jeep. I could have gone back for it, but a 244-mile round-trip would have been too expensive in the Jeep. Had I thought about it just a little bit more, I would have found a way to take it that day and I could have used it for the back of the shed instead of buying the sheet of OSB.
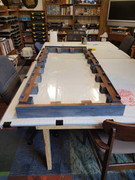
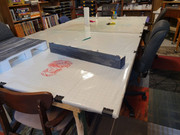
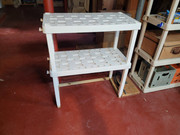
Quick little project today, took about 70 minutes.
Also can see the converted Billiards Ball Rack in use.
So I needed more shelves specifical for larger miniatures. I took 1 old shelf from the last house and a piece of scrap from another and built this simple unit. As it was already painted, it really sped the project up.
The shed in the back yard was probably built in the mid-'70s. Maybe earlier. Who can say? Well, a couple of years ago it was too dilapidated and I decided to replace it – despite never having attempted such a thing. Below are three pictures showing the completed roof, the new rafters/frame, and the demolished old roof.
Our handyman brought his 12-year-old son and a nephew, and he supervised as they put the roof roll on the sheeting I’d put up.
The picture of the rafters shows the shed before painting, and with the rotting hollow-frame door. The finished picture shows the shed painted, and with a ‘new’ solid door I got at Re-Store and had cut to fit.
The framing of the shed itself was skimpy. What little rigidity there was to the structure was provided by the bevel board sheeting – which, as I said, was very old. I used a 4x8 sheet of 7/16-inch OSB on the lower parts of both side walls, plus some on the lower parts of the front. (All inside of it, of course. No way I was tearing down and rebuilding the whole thing!) It’s nice and solid now.
The Missus wanted to save money by not paying for a storage unit, so I spent about $700 buying a tent shed and building a floor for it. For those keeping track, this was my fist DIY shed project. The new roof on the old shed was my second, and the woodshed was my third.
The 12 pictures aren’t in any order since I uploaded them all at once. I got a bunch of concrete piers and used pressure-treated 2x6s for the floor frame. I had to dig so everything was level, of course. I sheeted the floor with plywood, because as my first project I hadn’t figured out that OSB is cheaper and everyone uses it. Grey deck paint (still being used on the woodshed floor!) protects the floor from moisture. I bought the 7x12 tent shed from Amazon, and just bolted the frame to the floor, then put the cover on. One thing not shown in the photos is that I used tack strips around the bottom to discourage critters from getting in.
 . .
. .  . .
. .  Click small pictures for larger.