Although I usually modify kits a bit (or more than a bit ) to make them mine, this one was so striking that I left it pretty much alone. I bought it maybe a couple years ago, and after an initial flurry of activity, in which I added some lighting, did quite a bit of work squaring and truing up the base and electrode tower, and painted most of the figure, the project got set aside.
But I’d been working on it now and then as a sort of third back-up project; and then just recently I said, “Why haven’t I finished this yet?”, pulled up my socks and wrapped up all the loose ends.
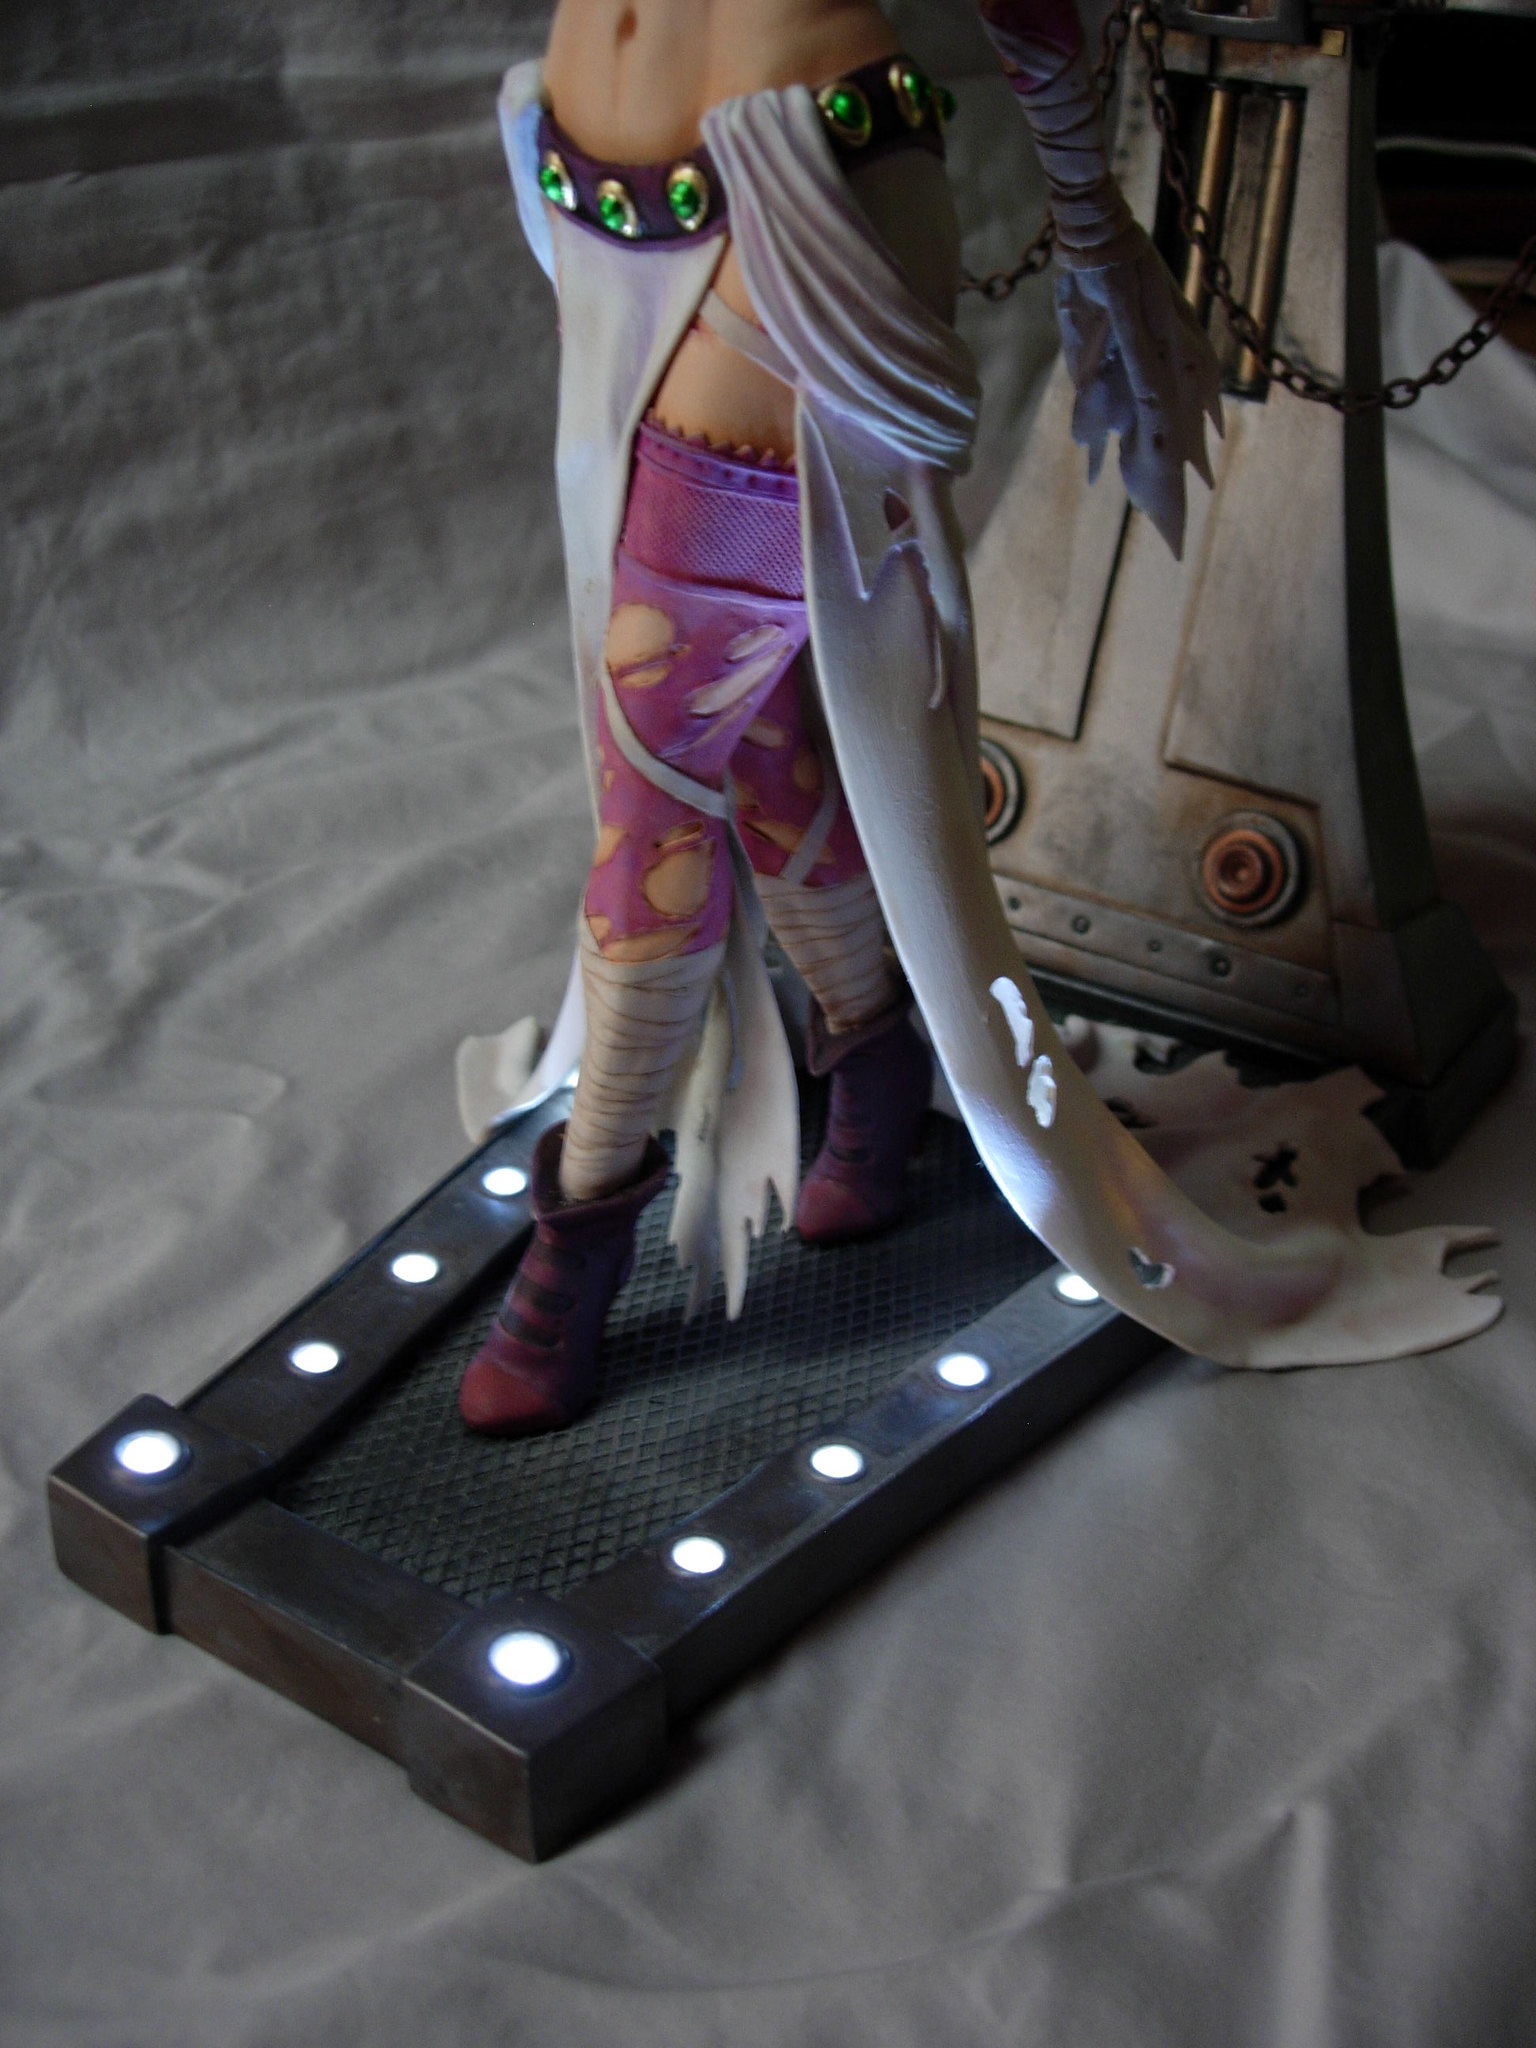
The paint is my usual oils, although I used some pastels on her gown to dirty it up a bit; and the gems on her belt are done using gold leaf (which is great fun!). You can see some dust on her base as a result of her long hiatus on the shelf; but I tell myself that it just adds to the ambiance
Anyway, without further ado, Bride of Frankenstein (Re-Engaged):
The parts of a resin kit typically have flash, seam lines, and pinholes to remove or fill; most devastating is mold mismatch, where you get a “step” in the surface you have to fill or sand off, somehow restoring any surface texture afterwards. This particular kit was very well done, with a minimum of that sort of thing to mess with. Some kits, especially older ones or ones cast from worn molds, can be a stone-plated b*tch to get cleaned up. One leather-jacketed vampiress I did recently was an absolute hassle from beginning to end. And, in face, yet another version of the Bride I just bought has lovely texture on the bandages (I suspect the sculptor used medical tape) but enough mold mismatch that I’m going to have to obliterate a considerable portion of the texture getting rid of the mismatch. Aaaaaaaarrrrrrrrggggggh.
It’s kind of a paint-assemble-paint-assemble process, with plenty of forethought and test fitting needed to be sure of the sequence. On this particular model it went like this:
First, of course, is the cleanup: Removal of seamlines, puttying of holes and porosity, etc.
I glued her leg and arms on, then made sure that her trailing gown was going to fit right; repeated test fits, some putty, some filing, etc. Then I painted her flesh tones (and eyes), stockings, and bandages, and the insides of the gown pieces, because parts of all of those were going to be tough to access once the gown was on.
I then glued her gown on and puttied and sanded the joints between the two halves and between the gown and her derriere. Once that was looking good, I painted the outside of her gown, and the left shoulder drapery, and the trailing cuffs, because those were all going to be the same color.
Now she was pretty much complete, except for the shoulder drapery and the trailing cuffs. I glued on the cuffs. Next I painted the corset and the belt, added the shoulder drapery, and did some final paint work, including dirtying up the gown a bit and gold-leafing and painting the emeralds on her belt.
BTW, you can take my question as a compliment, because I couldn’t see any seam lines where she was glued together. Though I suppose that that’s one benefit of a Bride of Frankenstein model, that you can hide the seams with scars: She’s supposed to have seams.
All I can say is, if Katie Nanna had looked like that, Mr. Banks would have nailed Jane’s and Michael’s feet to the nursery floor rather than let her give her notice…
I never built one of those back in the day, but when it was reissued (well, actually the company paid for a whole new set of molds (!!)) a few years ago–2001-- I built one. Quite a challenge to get the seamlines all along the sides of her body to disappear.
I’d have bought it, but 1. It seemed a little crass, even for me, 2. It was only available as a preorder, which made me nervous, 3. No contest in America would have let me enter it, and most importantly 4. Mrs R wouldn’t have let me build it

